
Capturing ballet photos is all about finding that perfect blend of grace and emotion. First, scout out a location that vibes with your dancer’s style—think dreamy parks or dramatic urban spots. Then, nail the lighting! Golden hour sunlight does wonders. Don’t forget to capture those elegant lines in the poses. After snapping away, a little post-processing magic can bring everything to life. Stick around to discover more tips and tricks to enhance your ballet photography game!
Understanding the Essence of Ballet Photography

When you immerse yourself in ballet photography, you’re not just snapping pictures; you’re capturing a world of grace, emotion, and, let’s be honest, a bit of sweat and tears too. It’s all about that fleeting moment—the dancer’s expression, the perfect alignment of limbs, the way their body seems to defy gravity. You’ve gotta be ready to catch that split second when the magic happens. Timing is everything!
Think about the stories you want to tell. A dancer’s joy, struggle, or determination can be powerful. You don’t just want pretty poses; you want to evoke feelings.
And hey, don’t forget about the details! Those delicate shoes, the fabric of the costume, even the subtle way a dancer holds their head—all of it matters. Ballet isn’t just a performance; it’s a narrative, and your lens should tell that story with every click!
Choosing the Right Location and Background
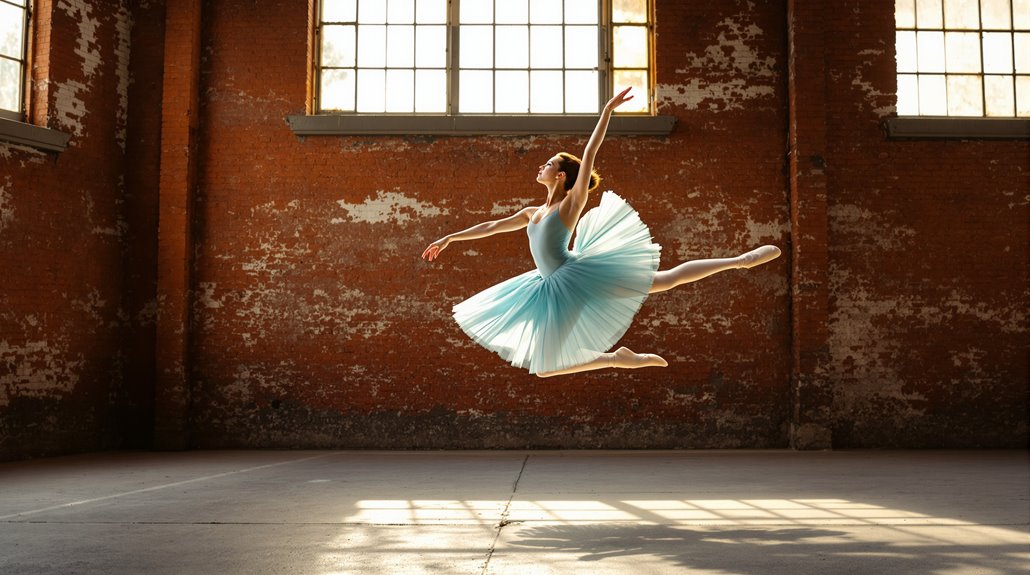
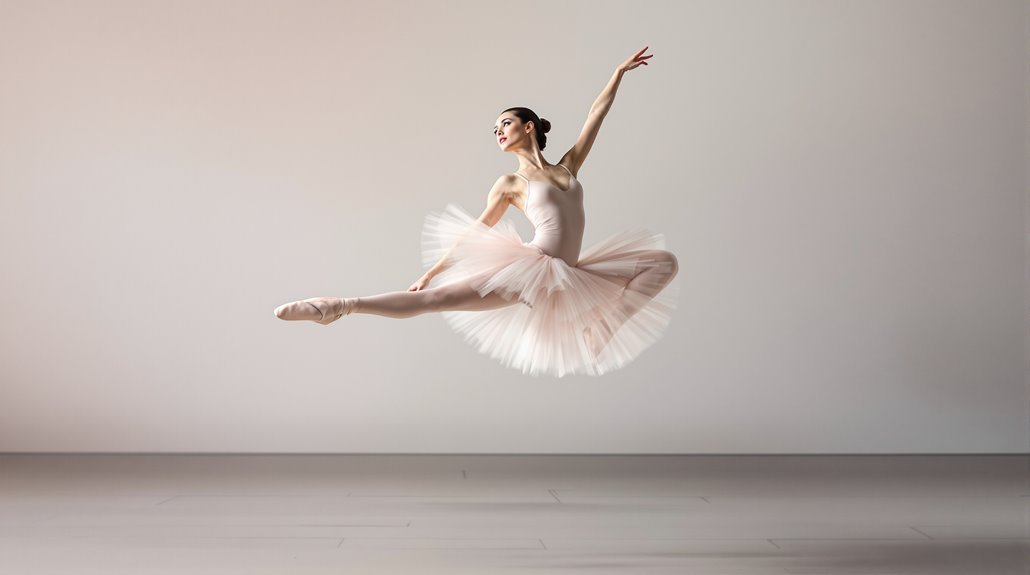
Finding the right location and background for your ballet photos can feel like searching for a needle in a haystack, especially when you want everything to be picture-perfect. You’ve got to think about the vibe you want. Is it dreamy and ethereal or bold and dramatic? Parks with blooming flowers can add a whimsical touch, while urban settings with gritty textures can create a striking contrast.
Don’t forget about practical stuff, too! Think about space for those graceful leaps and twirls. You wouldn’t want your dancer bumping into a tree, right? Also, consider colors that complement the ballet attire. A soft pastel background can really make those tutus pop, while a muted brick backdrop could add an edgy flair.
You’ve got this! Just remember to scout locations ahead of time, and don’t hesitate to get creative. The perfect spot is out there, just waiting for you!
Mastering Lighting Techniques for Ballet Shots
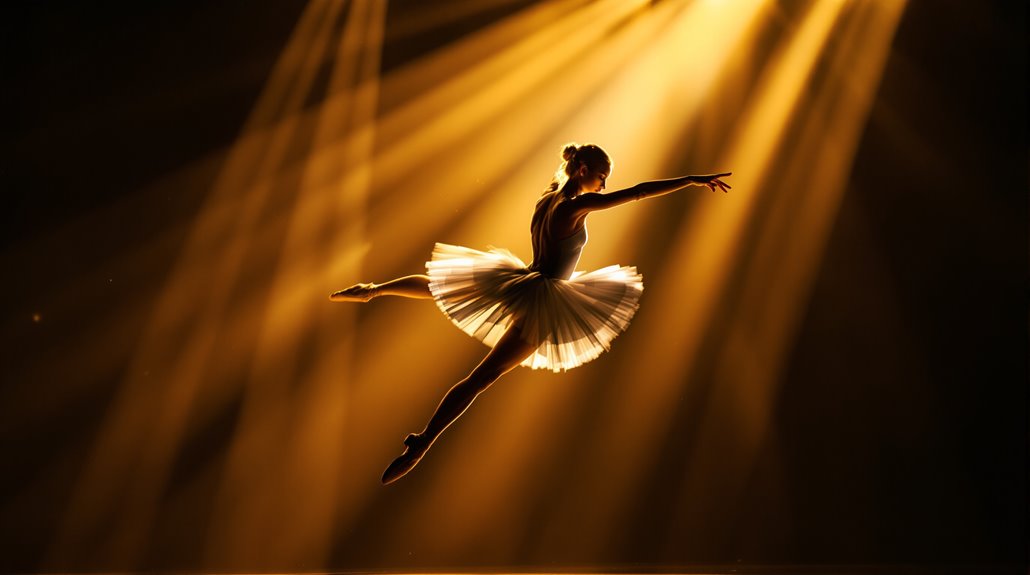
While you might think that nailing the perfect ballet shot is all about the dancer’s grace, let’s not forget that lighting can make or break your photos. Seriously, good lighting can transform a decent snap into a breathtaking masterpiece. First off, natural light is your best friend. Try shooting during golden hour—just after sunrise or before sunset. The soft, warm glow can highlight those delicate movements beautifully. But hey, if you’re stuck indoors, don’t panic! Use softboxes or diffusers to mimic that dreamy daylight.
And remember, avoid harsh shadows; they can be as unflattering as last year’s fashion trends. Experiment with angles too! Position your light source to the side or behind the dancer for a dramatic silhouette effect. Trust me, these little tweaks can enhance your ballet photography game to a whole new level. So, grab that camera, and let’s illuminate those magical moments!
Posing and Movement: Capturing the Dancer’s Grace
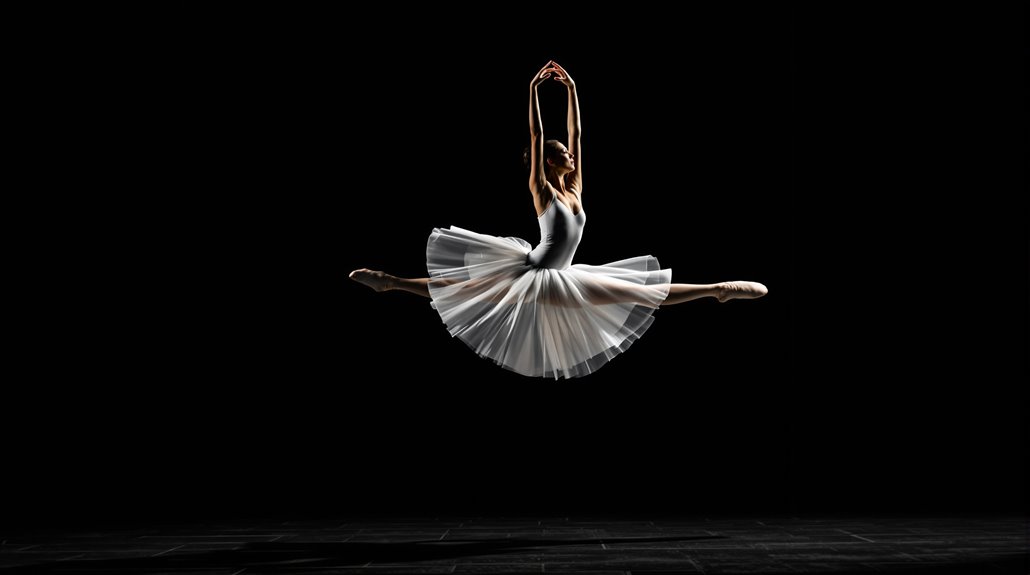
Capturing the dancer’s grace isn’t just about snapping the perfect moment; it’s about understanding how to pose and move them to showcase their artistry. You’ll want to encourage them to express their emotions through every stretch and leap. Think about the lines of their body—how their arms extend and how their legs create shapes. It’s not just about the big moves; those tiny nuances matter too!
Try to give them direction while allowing room for spontaneity. You might say, “Can you try a softer landing?” or “Let’s see that pirouette with a little more flair.”
Also, don’t be afraid to experiment! Sometimes the best shots come from unexpected angles or just capturing that split second when they’re truly in their element. Remember, the goal is to make them feel comfortable and free; that’s when their true grace shines through. Happy shooting!
Post-Processing Tips to Enhance Your Ballet Images
Once you’ve captured those breathtaking ballet moments, the real fun begins in post-processing—because let’s be honest, even the most extraordinary shots can benefit from a little digital magic! Start by adjusting the exposure and contrast to improve the dancer’s elegance. Too dark? Lighten it up! And if those colors aren’t popping, don’t hesitate to tweak the saturation.
Next, consider cropping for a more vibrant composition. Sometimes, less is more, and getting rid of distractions can make your subject shine. If you’re feeling adventurous, try adding a soft vignette to draw focus to the dancer.
And don’t forget about sharpening your image—nothing says “wow” like crisp details that highlight those complex movements! Finally, always save a copy of your original shot before diving into edits. You never know when you might want to go back to that unfiltered magic.
Conclusion
With the right location, lighting, and a sprinkle of creativity, you can totally capture the magic of ballet in your photos. Don’t stress if it doesn’t all come together perfectly on your first try—every great photographer has their off days. Just keep practicing, experimenting, and having fun! Before you know it, you’ll be snapping shots that make people feel like they’re watching a live performance. Now, go out there and dance with your camera!